How to Use Fluorescent Paint on Walls for Stunning Effects?
Fluorescent paint can transform ordinary walls into breathtaking displays of art. Renowned expert in wall design, Carlos Martinez, states, "Pintura Fluorescente Pared offers limitless creative possibilities." This technique not only enhances aesthetics but also creates captivating visual experiences in any space.
Using fluorescent paint is more than just adding color to a wall. It requires understanding how light interacts with these vibrant hues. Each brushstroke should be intentional, and the choice of backdrop matters. Proper execution can result in an astonishing final look, but it also involves challenges. For instance, the paint's bright nature may not suit every room's atmosphere.
To achieve stunning effects, consider the surrounding light and furniture. Experimenting with patterns may yield unexpected results. Mistakes can happen, leading to unplanned designs that may surprise you. Embrace the imperfections; they often become the most beautiful aspects of your creation. With careful planning and creativity, "Pintura Fluorescente Pared" can truly elevate your space.
Understanding Fluorescent Paint: Types and Composition
Fluorescent paint is known for its vibrant colors and unique glow under UV light. Understanding its types is essential. There are two main categories: water-based and solvent-based. Water-based paints are easier to clean and less toxic. Solvent-based paints, on the other hand, often provide a more intense color and durability. However, they may emit strong fumes during application.
The composition of fluorescent paint typically includes special pigments that can absorb and re-emit light. These pigments are often mixed with a binder to create a paint that adheres well to surfaces. Many people might overlook the importance of prepping the wall before application. A smooth surface ensures the paint adheres properly and enhances the glow effect.
Experimenting with different techniques can yield surprising results. Stencils or sponges can create patterns. Yet, not all techniques work perfectly; some may require adjustments over time. Fluorescent paints need careful application to achieve the desired look. Each project may demand reflection and tweaking. This trial-and-error approach can lead to truly stunning effects on your walls.
Surface Preparation: Ensuring Optimal Adhesion and Finish
Surface preparation is essential for achieving stunning effects with fluorescent paint. Properly preparing your walls will ensure the paint adheres well. Start by cleaning the surface thoroughly. Dust, grease, and dirt can prevent the paint from bonding. Use a mild detergent and water to clean. Rinse with clean water, and let it dry completely. A clean surface helps the paint shine its brightest.
Next, check for any imperfections on the wall. Fill in holes and cracks with a suitable filler. Sand the repaired areas to achieve a smooth finish. The smoother the surface, the more vibrant the paint will appear. It’s important to note that uneven surfaces may absorb paint inconsistently. You might need to apply an additional coat if the wall is rough.
Finally, consider priming the wall before applying fluorescent paint. A primer helps create a uniform base and enhances the paint’s glow. Test a small section first. This can reveal any potential issues. If the primer peels, you may need to rethink your approach. Not every wall is suitable for fluorescent effects, so experimentation is key.
Application Techniques: Brush, Roll, and Spray for Best Results
When applying fluorescent paint, you have multiple techniques at your disposal. Each method—brush, roll, and spray—offers unique benefits. Using a brush allows for precision. It’s great for detailing or adding patterns. However, a brush can leave streaks if not used carefully. Practice on a spare surface to refine your technique.
Rolling is excellent for larger areas. A roller can cover more space quickly, but it's essential to use even pressure. Uneven pressure can lead to unintended splotches. It’s helpful to make sure the roller is adequately saturated. Test it on a scrap piece first. This can save you from frustration on your walls.
Spraying provides a smooth finish. It's perfect for those seeking a uniform look. However, it can be tricky. Overspray may occur, so cover surrounding areas well. Keep the sprayer moving to avoid drips. Remember to wear protective gear; safety is key. Fluorescent paint can glow beautifully, but its application requires care and attention.
How to Use Fluorescent Paint on Walls for Stunning Effects?
| Application Technique | Best For | Instructions | Recommended Tools |
| Brush | Detail work and edges | Use a flat brush to apply paint evenly. Work in small sections. | Flat Brush, Paint Tray |
| Roller | Large wall areas | Use a roller for even coverage. Start from the top and work your way down. | Roller Brush, Extension Pole |
| Spray | Creating patterns and effects | Evenly spray across the surface in sweeping motions. Use stencils for patterns. | Spray Gun, Stencils |
| Sponge | Textured effects | Dab the sponge in paint and press onto the wall for a textured look. | Sponge, Mixing Tray |
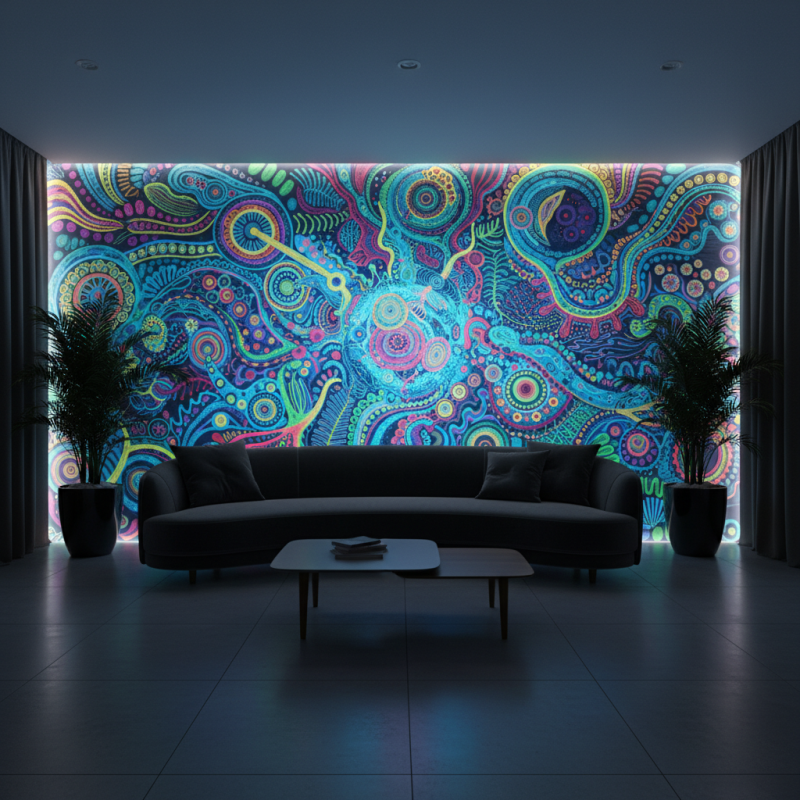
Lighting Considerations: Enhancing Fluorescent Effects with Proper Lighting
When using fluorescent paint, lighting plays a pivotal role. Proper lighting enhances the vibrancy of fluorescent colors, creating a more immersive experience. Reports from industry experts indicate that fluorescent effects can be up to 30% more pronounced with the right lighting conditions. This is significant for interior designers looking to transform spaces.
Consider the type of light you use. UV or black lights often yield the best results, making colors glow intensely. However, not all fluorescent paints perform equally under various lighting. Some shades may appear muted or lifeless in certain lights. It’s essential to test different paints in multiple light settings. This trial-and-error process can uncover unexpected flaws in how colors interact with light.
In addition to lighting types, the positioning of your lights should not be overlooked. Angled lighting can create shadows and highlight textures, adding dimension. A survey from a design agency revealed that spaces with multi-directional lighting are perceived as more inviting and dynamic. Experimenting with placement and intensity can uncover stunning visual effects, but it requires patience and a willingness to adapt your approach.
Safety Guidelines: Handling and Precautions with Fluorescent Paint
Using fluorescent paint can create breathtaking effects on walls, but safety is paramount. Proper handling and precautions are essential to ensure a safe painting experience. According to the U.S. Environmental Protection Agency (EPA), fluorescent paints may contain solvents and chemicals that can be harmful. Always check product labels for safety guidelines.
Before starting, ensure proper ventilation. Open windows and use fans to circulate air. This step minimizes inhalation of harmful fumes. A study by the National Institute for Occupational Safety and Health (NIOSH) found that prolonged exposure to paint fumes can lead to respiratory issues. Wearing masks and gloves is also advisable. Shields your skin from irritation and minimizes inhaling particles.
Consider keeping fluorescent paint away from areas with children or pets. Accidental ingestion can cause health issues. Properly store leftover paint in a sealed container to prevent accidental spills. Remember, even vibrant paint comes with responsibilities. Reflect on the impact of your materials on the environment. Regularly review safety protocols to ensure they align with current data and best practices.
Usage of Fluorescent Paint Safety Guidelines