Menü öffnen Menü schließen

How to Choose a Heat Transfer Film Printer in 2026

Choosing a Heat Transfer Film Printer in 2026 is not just a question of print speed. It is a decision about the jobs you expect to run, the materials you can source, and the finish customers will actually accept. A small workshop printing names on cotton shirts has different needs from a production floor handling repeated, full-color designs. The details matter.

Grand View Research valued the global digital textile printing market at approximately $2.7 billion in 2023 and projected a 12.1% compound annual growth rate from 2024 to 2030. This broad market figure is useful context, not a forecast for film printers alone. It suggests growing interest in digital textile workflows, but it cannot tell you which machine will suit your shop. That distinction is easy to miss.

This guide focuses on the practical checks behind a sound purchase: print quality, film compatibility, software, maintenance, operating costs, and dependable service. Ask suppliers to print your own artwork, then inspect fine lettering and solid color areas under normal lighting. Test the transfer on the fabric you actually sell. Wash it, stretch it, and check for edge lifting. A showroom sample proves very little. I would also compare real production time, not just the fastest speed listed on a spec sheet. There is no perfect printer. A careful test can still expose the wrong one.

How to Choose a Heat Transfer Film Printer in 2026

What a Heat Transfer Film Printer Does

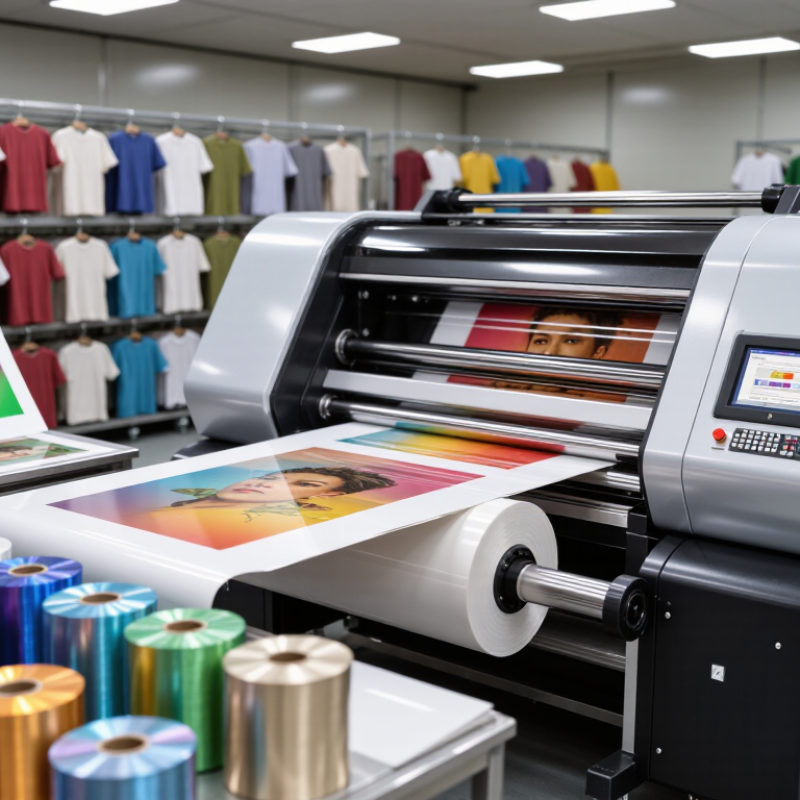
A heat transfer film printer places a design onto a thin carrier film, usually from a digital file. In many direct-to-film workflows, the printer lays down color and, when required, white ink. The white layer helps colors show on dark fabric. The printed film may then receive adhesive powder and pass through a curing step. Not every setup includes these stages in one machine. That detail is easy to miss.

After curing, the film is positioned on a garment and pressed with controlled heat, pressure, and time. The design releases from the film and bonds to the fabric. The printer creates the image; it does not usually perform the garment transfer. Results depend on ink, film, adhesive, fabric, and press settings working together. A small change in fabric texture can affect the finish. The workflow can also feel less tidy than product photos suggest.

Tips: Check whether a printer supports the film and ink you plan to use. Read the transfer material’s temperature and peel instructions. Test a small fabric swatch before a full run. Keep notes on settings; memory is surprisingly unreliable.

How to Match Printer Types to Your Production Needs

How to Choose a Heat Transfer Film Printer in 2026

Match the printer to the work you actually receive, not the biggest order you might get. A direct-to-film system suits shops producing full-color designs across cotton, blends, and varied garment colors. It can handle short runs without screens, but powder application and curing add steps.

Keep white-ink circulation and daily cleaning in the plan. They are easy to underestimate. A small shop may run out of workspace before it runs out of print capacity.

Printable heat-transfer vinyl works well for simpler graphics, names, and bold shapes that need clean edges. Check whether the printer, film, ink, and press are designed to work together; a sample on your own fabric is more useful than a glossy specification sheet.

For steady, high-volume repeat designs, screen-printed transfers may be worth comparing, even if production is outsourced. There is no perfect setup. Track actual jobs for a few weeks: colors, garment types, changeovers, and missed deadlines.

The pattern may challenge your first guess. A printer that fits today’s workflow is often safer than one chosen for an imagined future.

Which Print Specifications and Features to Compare

When choosing a heat transfer film printer, compare usable print width, production speed, and resolution under the same operating mode. A headline speed may describe a draft setting, not a sale-ready print. Ask for a timed sample using your typical artwork and film. Check fine text, gradients, and small gaps between colors. Inspect the edges closely. Grand View Research’s Digital Textile Printing Market report estimated the market at USD 2.7 billion in 2023, with a projected 12.2% annual growth rate from 2024 to 2030. This is broad market context, not evidence that any printer will meet your shop’s needs. A specification sheet can still mislead.

Compare ink options and white-ink handling, especially if your designs use opaque underlays. Ask how often circulation or cleaning is needed, and what routine maintenance takes. Review the RIP software’s color controls, file compatibility, and nesting tools. Also check whether the dryer or curing unit can keep pace with the printer. A bottleneck matters. Request samples on your own film, then press them onto the fabric you actually sell. Record wash results and color changes after pressing. I would not choose by resolution alone; a sharper test image means little if production speed, maintenance, or transfer consistency falls short. Some details are easy to overlook. Keep the sample settings and results, since a showroom demonstration may not reflect daily work.

How to Choose a Heat Transfer Film Printer in 2026

Compare Native Resolution and Theoretical Pixel Pitch

Pixel pitch is calculated as 25.4 mm divided by the stated DPI. A smaller pitch can support finer detail, but it does not guarantee sharper prints: ask whether the resolution is native, and check print samples, ink performance, and film compatibility before choosing a printer.

How to Assess Materials, Workflow, and Operating Costs

How to Choose a Heat Transfer Film Printer in 2026

Assess materials with real garments, not just a sample sheet. Test the film, adhesive, ink, and powder on the cotton, polyester, and blends you actually sell. Check wash durability, stretch, edge lifting, and color after pressing. Small details matter. Textile Exchange’s Materials Market Report 2024 estimates global fiber production reached 124 million tonnes in 2023, with polyester making up 57%. That scale reflects a varied substrate market, but it does not guarantee one transfer recipe will suit every fabric. Keep a test log. I still find it easy to underestimate how much fabric finish changes results.

Map the complete workflow before comparing printer speed. Record curing time, press temperature, labor between steps, and how often jobs need reprints. A fast printer can still create a slow production day if powder application or curing becomes a bottleneck. Ask for a live demonstration using your artwork and garments. Check whether small text stays crisp and whether a dark print feels overly thick. It can be inconsistent.

Build operating costs per usable transfer, not per printed meter. Include film, ink, powder, maintenance, electricity, rejected prints, and operator time. Measure power use during a normal production run; a nameplate rating alone will not show actual consumption. Track waste for several weeks, including setup prints and failed transfers. Compare those records with the supplier’s stated output, then leave room for seasonal workload changes. A simple spreadsheet beats a polished estimate.

How to Choose a Heat Transfer Film Printer in 2026 - How to Assess Materials, Workflow, and Operating Costs

Use this comparison as a practical buying checklist for direct-to-film (DTF) printing. Specifications and results vary by printer, ink, film, adhesive powder, fabric, and working conditions; verify requirements with suppliers and run production samples before purchasing.

Assessment area What to check Practical benchmark or test Effect on workflow and operating cost
Print technology Confirm that the printer is designed for DTF transfer film, rather than direct-to-garment, sublimation, or another film process. A typical DTF workflow prints a mirrored image with CMYK and white ink onto PET film, applies hot-melt adhesive powder, cures the powder, and heat-presses the transfer onto the item. Using equipment and consumables designed for the same process reduces compatibility issues, failed transfers, and wasted materials.
Print width Compare usable print width with the largest transfer you expect to produce, including spacing between designs. Compact systems commonly support film around 300–350 mm wide; wider roll systems around 600 mm are also common. Check the actual printable width, not just the film-roll width. A wider printer can gang more designs across a roll, but may require more floor space, larger curing equipment, and higher film and maintenance budgets.
White-ink system Ask how white ink is circulated, agitated, filtered, and maintained during periods of low use. Request a white-ink nozzle check after a normal production run and again after the printer has been idle for the period you expect between jobs. White ink is essential for opaque transfers on dark materials. Poor circulation or infrequent use can increase cleaning time, ink consumption, and downtime.
Film compatibility Check the required PET film thickness, coating, roll or sheet format, and release type. Test the exact film type you plan to use. Hot-peel, cold-peel, and other release films may require different press and peeling procedures. Unmatched film can cause poor ink adhesion, transfer defects, or difficult peeling. Using a qualified film consistently makes results and cost tracking more reliable.
Adhesive powder Confirm powder type, particle characteristics, curing requirements, and compatibility with the film and fabrics. Run wash and stretch tests on representative products after following the powder supplier’s curing and pressing instructions. Powder that is poorly matched or unevenly applied can lead to weak adhesion, excess residue, rework, and product returns.
Material range List the fabrics and finished products you intend to decorate, including light and dark garments. DTF transfers are commonly used on cotton, polyester, and many blends, but results depend on the transfer materials and fabric finish. Test each important fabric type. Testing helps identify limitations such as dye migration, texture, stretch, or heat sensitivity before they create costly production failures.
Heat-press settings Check the recommended temperature, dwell time, pressure, peel timing, and any post-press step for the specific transfer system. Approximately 150–165°C (302–329°F) for 10–15 seconds is a common starting range for some DTF systems, not a universal setting. Follow the consumable supplier’s instructions and test on the actual fabric. Correct settings affect adhesion, appearance, and durability. Record settings by material to reduce retesting and prevent rejects.
End-to-end workflow Map the steps from artwork preparation through printing, powder application, curing, pressing, and quality inspection. Time a complete batch, including file setup, printer preparation, curing, handling, press cycles, cleaning, and finishing—not just the printer’s advertised print time. Labor, curing capacity, and press capacity can limit output even when the printer itself is fast. A workflow test reveals the actual bottleneck.
Sellable throughput Measure finished, acceptable transfers per hour using the design sizes and job mix you expect to run. Run a representative production test and count good output after inspection. Include setup, maintenance interruptions, curing, and reprints in the measurement. Cost and staffing decisions should use sellable output rather than headline print speed or maximum resolution figures.
Consumables cost Price ink, film, powder, cleaning supplies, and packaging using local quotes and your intended suppliers. Calculate consumables cost per accepted transfer: total materials used for a test batch ÷ number of acceptable transfers. Repeat for different artwork coverage and sizes. Large white areas, frequent purging, and rejected prints can change consumables use substantially. Track actual usage by job type.
Energy cost Check the rated power and typical running load of the printer, curing unit, and heat press. Estimate electricity cost as: equipment power in kW × operating hours × local electricity rate. Use measured consumption where possible. Include all connected equipment, not only the printer. Curing and pressing equipment may run for different durations and affect total energy use.
Maintenance and downtime Review routine cleaning tasks, recommended idle-period procedures, replacement parts, and access to technical support. Ask for a written maintenance schedule and run a practical check of the cleaning and recovery procedures before committing to a production plan. Labor, replacement parts, cleaning materials, and lost production time should be included in the cost per accepted transfer.
Quality control Assess color consistency, fine-detail reproduction, white-layer coverage, transfer feel, and durability. Print the same test artwork on several representative fabrics. Inspect appearance and perform wash or stretch tests appropriate to the finished product. Quality checks help prevent reprints and complaints. Document artwork settings, consumable batches, press settings, and test results.
Total cost per item Build a complete cost model before comparing purchase prices. Include film, ink, powder, electricity, labor, routine maintenance, rejected transfers, equipment financing or depreciation, and packaging. Compare systems using cost per accepted, finished item at your expected production volume—not cost per print or equipment price alone.
Purchase decision Choose based on the combination of required width, daily job volume, material range, available space, and support needs. Request a sample run using your own artwork and fabrics. Record output quality, elapsed production time, material use, and cleaning requirements. A successful trial provides a stronger basis for estimating capacity and operating costs than specifications alone.

Costing note: Prices, power consumption, maintenance frequency, and achievable output depend on location, equipment configuration, job mix, and operating practices. Obtain current local quotes and use measured pilot-run data for final calculations.

How to Verify Reliability, Support, and Safety Standards

A reliable heat transfer film printer should perform consistently beyond a single showroom sample. Ask for proof. Request a live demonstration using your film, adhesive powder, and target fabric. Run several jobs, then inspect alignment, color, and feeding for drift or jams. Watch it run. Record warm-up time, operating noise, and any temperature fluctuations. A checklist can miss small faults, so repeat the test after the machine cools and starts again.

Support matters when production stops. Ask for written response times, operator training details, warranty exclusions, and the expected availability of common replacement parts. Speak with a current user, if possible, and ask how long repairs actually took. Get the service process in writing. Vague promises are difficult to rely on, even when a sales conversation feels reassuring.

Check safety documents for the exact printer model and configuration, not just a similar machine. Verify certificates with the issuing organization and confirm they apply in your location. Inspect guards, emergency stops, electrical grounding, and ventilation during the demonstration. Ask for clear instructions on hot surfaces, routine cleaning, and maintenance isolation. Do not treat paperwork as a substitute for seeing the safeguards work. Safety details can feel tedious, but overlooking one can affect operators every day.